For the past 6 years I have been messing exclusively with debian. 2 Years before that I started playing in Linux like many of us did: Installing Ubuntu. It was cool and stable to run Debian after all headaches I had with Ubuntu crashing apps and so on through the years. But I felt disappointed after every new game launched that I could not run in Debian as its dependencies are not updated as frequent as other flavors of Linux are. So, some months ago Valve released a statement saying that they were about to launch its new console called Steam Deck and it would run on an Arch Linux/KDE based envrionment and I thought: Why not? Since then it’s been great to know that there are easier ways of installing things (Yes, with aurman you can easily install almost anything that is made for Linux). But not always things can be installed and configured so easily because of the lack of information about how to install things in Arch Linux. That’s why I decided to write this article with everything you should do to install Guitarix.
Guitarix is an amp and effects emulator for guitars and basses. I have always played my guitar with it once I am a financially broken middle guitarist. My laziness was preventing me from installing it once I thought it would be a tough task as maybe Arch Linux didn’t have all dependencies ready to install through aurman as Debian did for most of them except Cadence. Surprisingly, aurman is all it’s needed to run Guitarix without issues. Here it goes:
First of all: You need to have aurman installed. I haven’t checked if it is necessary to have aurman installed to manage to install all dependencies but once I had it installed and it could ease the task I just decided to use it. Even if you manage to install everything using only Pacman you should consider installing it as it can install applications from Github repositories without any struggle. As I am not focusing on aurman installation, here it goes a good guide explaining how to achieve it.
If you’re done installing aurman, run the command below:
jondoe@machine:~$ aurman -Syyu && aurman -S jack2 jack2-dbus qjackctl \\
    alsa-firmware alsa-lib alsa-plugins alsa-utils pulseaudio-jack cadence guitarix
Note: It’s important to install alsa-utils as if you don’t, it won’t be able to show the audio interface you’re using to connect the guitar to your computer neither the audio interface you’re using as output for the audio in Candence.
After that, add the following lines before “# End of file” in /etc/security/limits.conf. It will ensure that the processor will give audio group the necessary priority to prevent delays in guitar audio.
# audio group
@audio           -       rtprio          95
@audio           -       memlock         unlimited
Check if your user is part of audio group:
jondoe@machine:~$ groups
audio jondoe sudo
If the output comes out as shown in the piece of code above you should skip the next step. If audio group was not shown, do:
jondoe@machine:~$ sudo usermod -a -G audio <your user here>
After that, log out and log in again. If you don’t know how to do that, simply reboot.
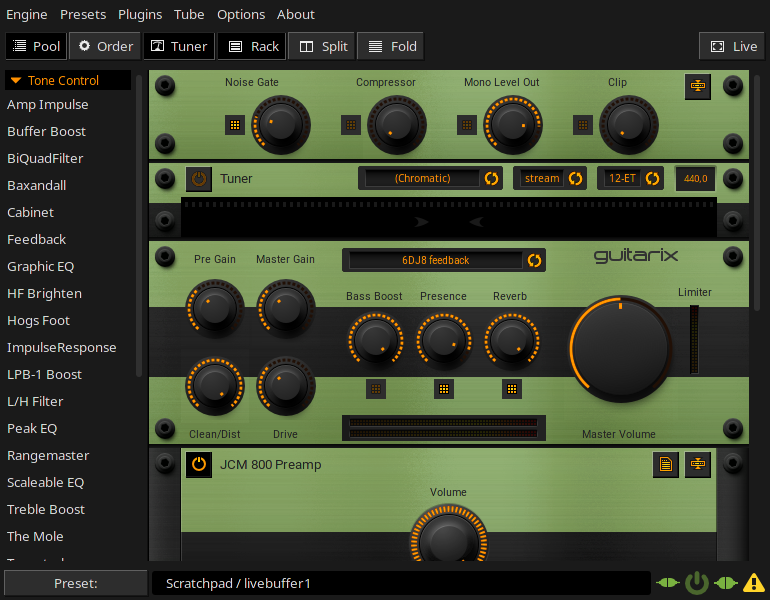
Now comes the best part of this tutorial: Making everything work!
Pay attention to the red squares with round corners I have drawn in the images below. They point out to the fields you must click, fill or pay attention to.
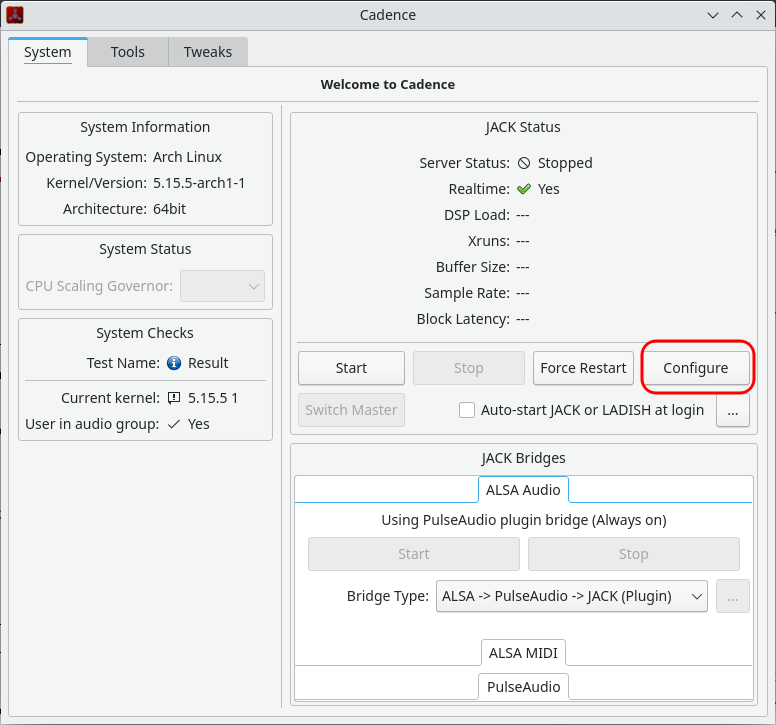
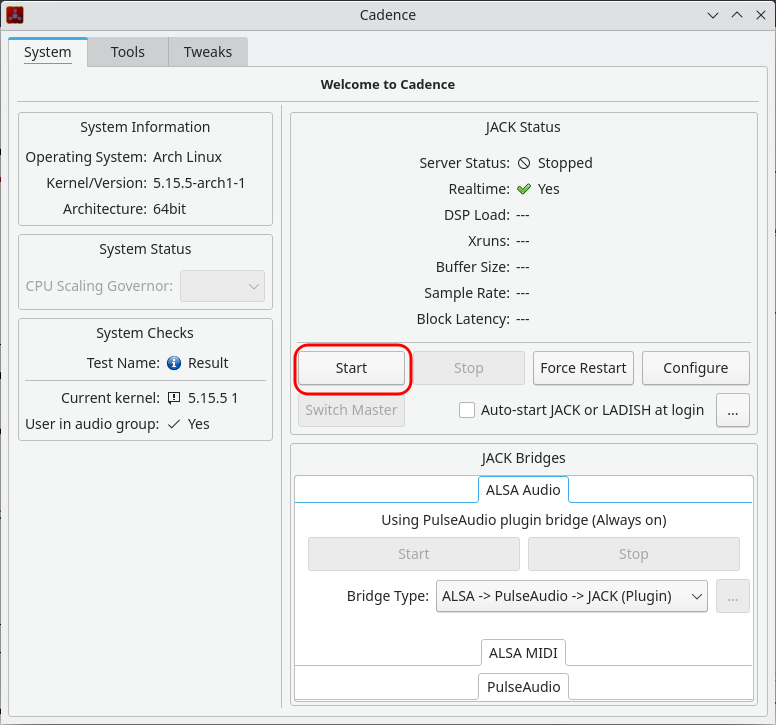
Click on Configure:
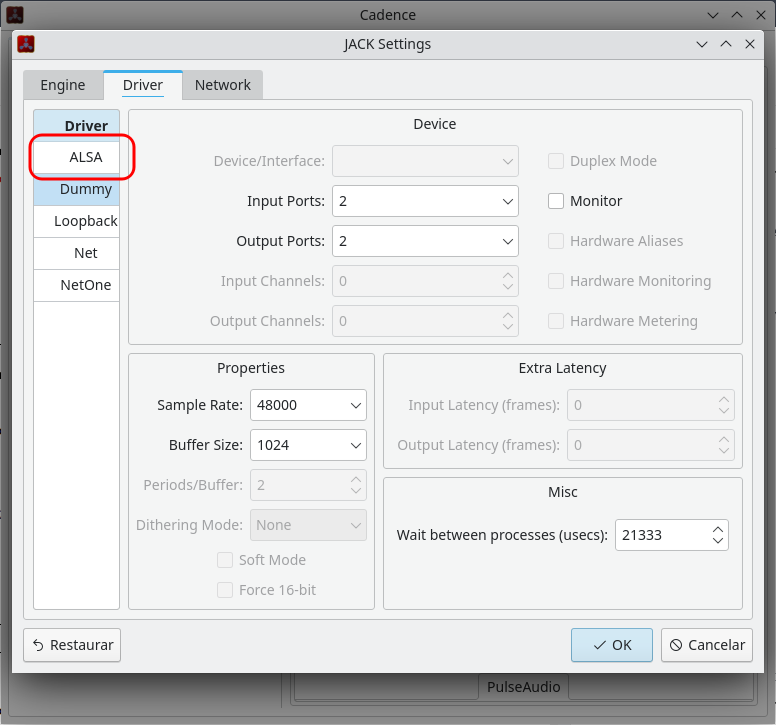
then, click on Alsa:
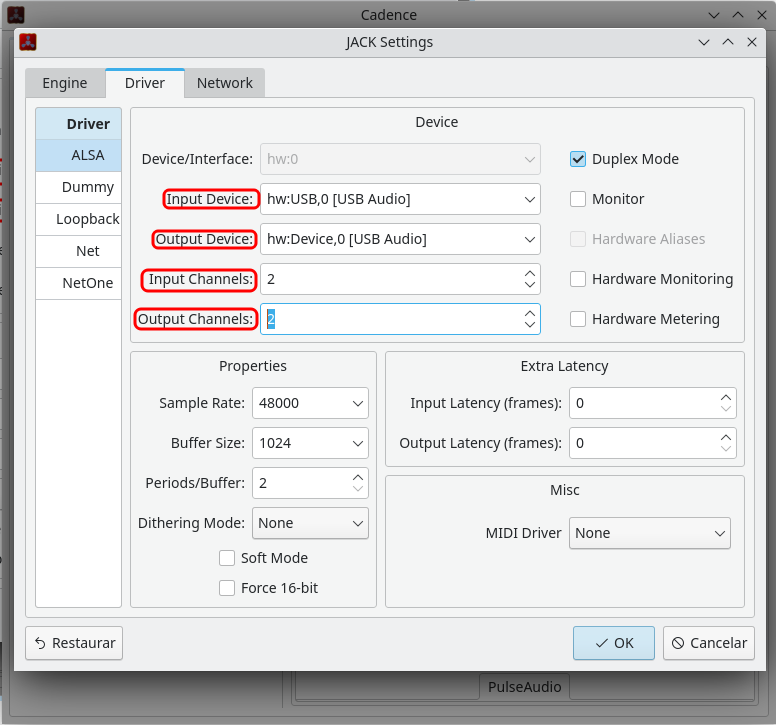
Configure all highlighted fields in the image below. You should know how many input channels your recording interface has and how many output channels your audio box or headphones have or it may not work when you click on “start”. The other parameters in properties section can be configured to fit your needs later. Don’t forget to press “OK” when you’re done.
Click on “start”:
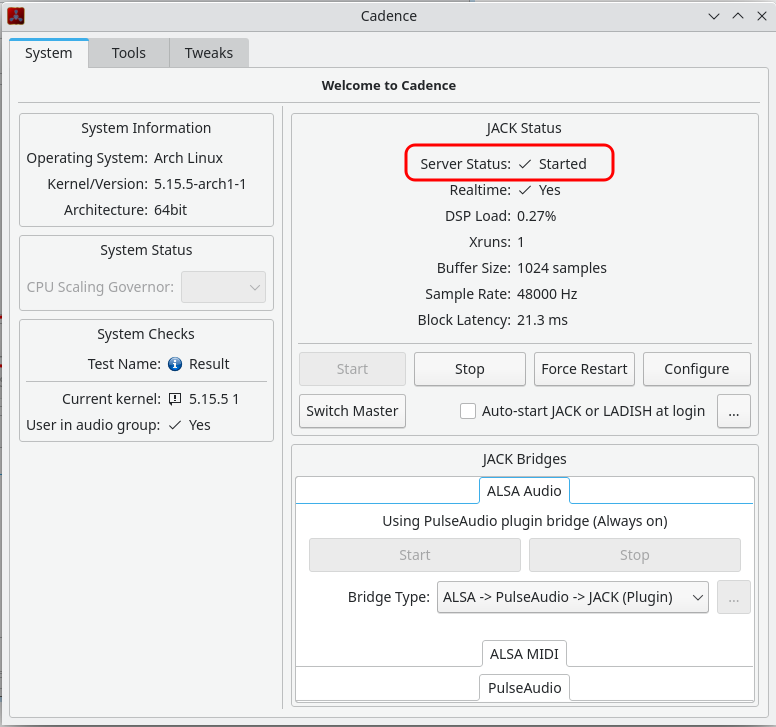
If is everything ok, you should see a message like the one highlighted in the image below:
Now open Guitarix and Qjackctl. In Qjackctl click on “start” and then on “graph” (I don’t know how Qjackctl’s interface is gonna show up in your Arch installation once mine is translated to portuguese but the image should help).

Connect your capture device output to “gx_head_amp”, “gx_head_amp”’s output to “gx_head_fx” and “gx_head_fx”’s both outputs to each system playback input as follows:
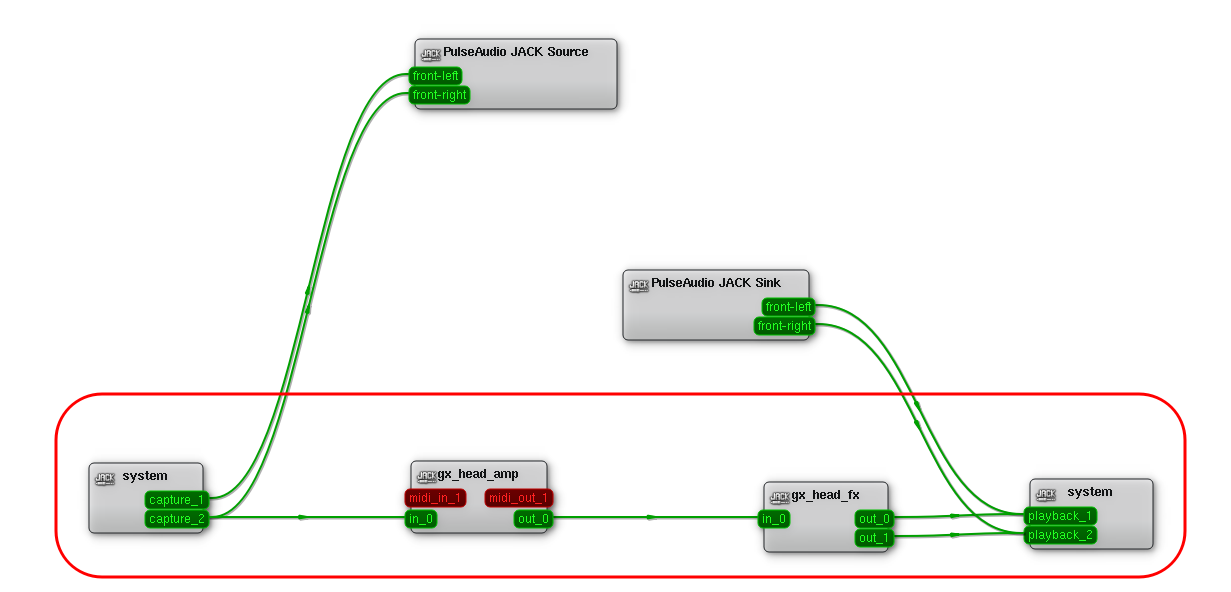
You should be able to make a sound with your guitar now unless you have connected any device wrongly. Each environment has its own particularities and the name of inputs and outputs may vary, so if it’s not working, try to connect a different capture device to “gx_head_amp”. In the image taken from my setup “capture_1” is my headset’s microphone. That means that if it’s not working is probably because you connected another recording device to “gx_head_amp”.
Well, I hope you enjoyed my first ever tutorial. Any question, please let me know through the comments section below in this post.

Comments